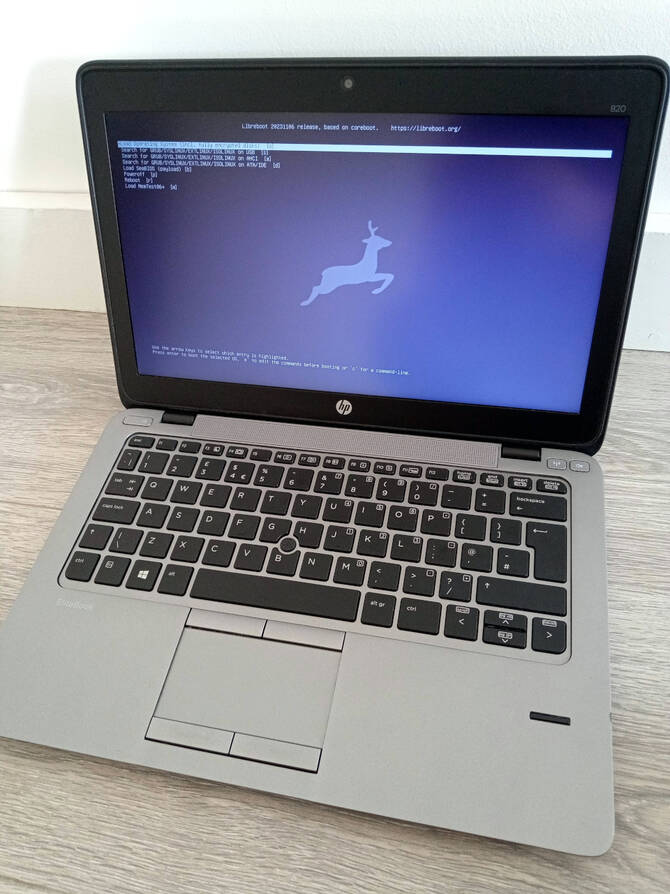
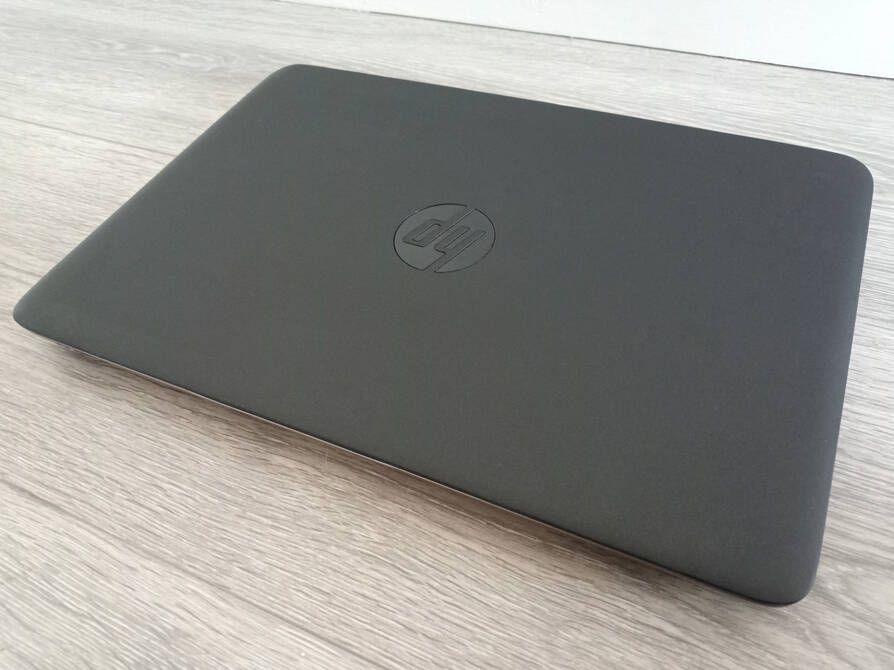
HP EliteBook 820 G2
- Home
- FAQ
- Download
- -
- Buy Libreboot preinstalled
- -
- Install
- Docs
- News
- Bugs
- TODO
- Send patch
- Contact
- -
- Donate
PLEASE READ THESE INSTRUCTIONS BEFORE INSTALLING, OR YOU MIGHT BRICK YOUR MACHINE: SAFETY PRECAUTIONS
| Specifications | |
|---|---|
| Manufacturer | HP |
| Name | EliteBook 820 G2 |
| Variants | EliteBook 820 G2 |
| Released | 2014 |
| Chipset | 5th gen (Broadwell, SoC) |
| CPU | Intel i5-5200U, i5-5300U, i7-5500U, i7-5600U |
| Graphics | Intel HD 5500 graphics (libre initialisation) |
| Display | 14" 1366x768 or 1920x1080 TFT |
| Memory | Two slots, max 16GB/slot (32GB), DDR3/SODIMM |
| Architecture | x86_64 |
| EC | SMSC MEC1324 in main boot flash |
| Original boot firmware | HP UEFI firmware |
| Intel ME/AMD PSP | Present. Can be disabled with me_cleaner. |
| Flash chip | SOIC-8 16MiB 128Mbit, 12MiB usable by coreboot |
W+: Works without blobs;
N: Doesn't work;
W*: Works with blobs;
U: Untested;
P+: Partially works;
P*: Partially works with blobs| Features | |
|---|---|
| Internal flashing with original boot firmware | N |
| Display (if Intel GPU) | W+ |
| Audio | W+ |
| RAM Init | W+ |
| External output | W+ |
| Display brightness | W+ |
| Payloads supported | |
|---|---|
| GRUB | Works |
| SeaBIOS | Works |
| SeaBIOS with GRUB | Works |
Full hardware specifications can be found on HP’s own website:
https://support.hp.com/gb-en/document/c04543492
Introduction
Unavailable in Libreboot 20231106 or earlier. You must compile from source, or use a release newer than 20231106.
This is a beastly 12.5" Broadwell machine from HP, the main benefit of which is greater power efficiency (compared to Ivybridge and Haswell platforms), while offering similar CPU performance but much higher graphics performance.
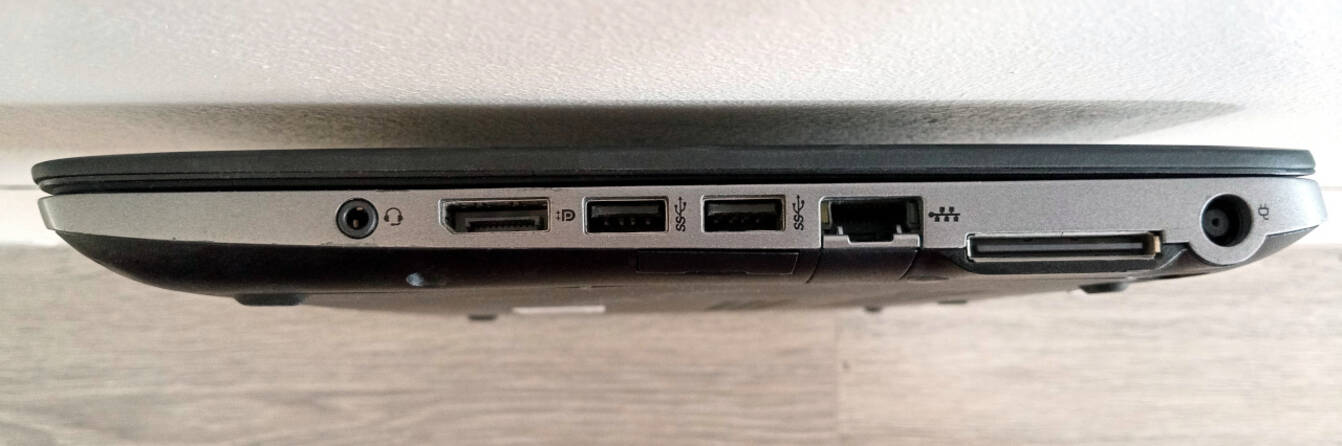
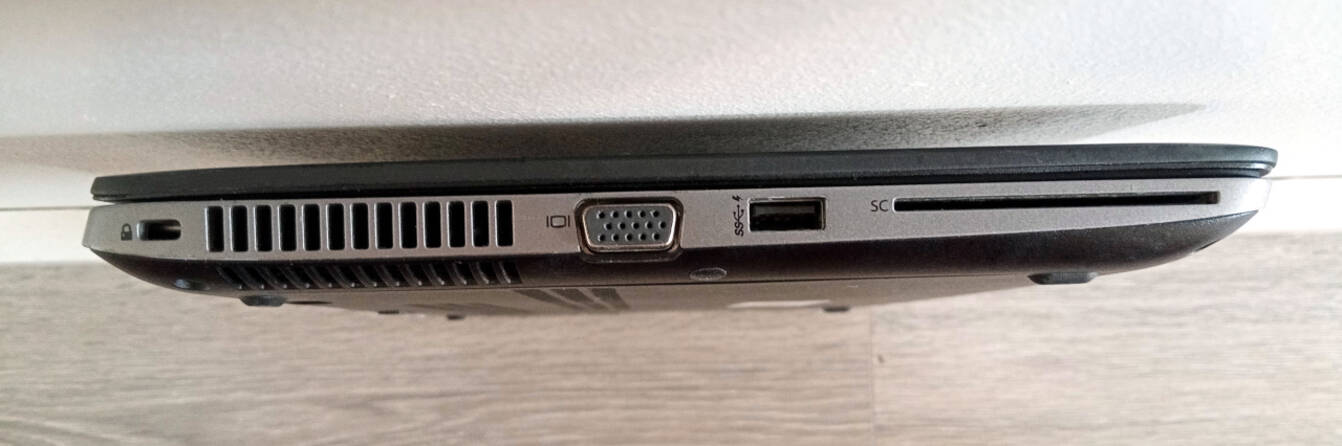
Variants exist with either Intel Core i5-5200U, i5-5300U, i7-5500U or i7-5600U and it comes with a plethora of ports; 3x USB 3.0, DisplayPort (which can do 4K 60Hz), a VGA port, can be expanded to 32GB RAM, has 3 slots which can take SSDs (PCIe, M2 and regular SATA), also has a side dock connector (for a docking station). The screen is eDP type and can be upgraded to 1920x1080.
This is a nice portable machine, with very reasonable performance. Most people should be very satisfied with it, in daily use. It is widely available in online market places. This page will tell you how to flash it!
All variants of this mainboard will come with Intel HD 5500 graphics, which has completely free software initialisation in coreboot, provided by libgfxinit.
Build ROM image from source
First, install the build dependencies and initialise git, using the instructions in building from source. Unless you’re using a release after Libreboot 20231106, you must use the latest lbmk.git.
The build target, when building from source, is thus:
./build roms hp820g2_12mbNOTE: The actual flash is 16MB, but you must flash only the first 12MB of it. The ROM images provided by Libreboot are 12MB.
There is a separate 2MB system flash that you must erase, prior to installing Libreboot. This, along with Libreboot’s modified IFD, bypasses the security (HP Sure Start) that the vendor put there, allowing you to use coreboot-based firmware such as Libreboot.
Installation
Insert binary files
If you’re using a release ROM, please ensure that you’ve inserted extra firmware required refer to the guide for that. (failure to adhere to this advice will result in a bricked machine)
If you’re building from source (using lbmk), the steps takes above are done for you automatically, inserting all of the required files. The above link is only relevant for release images, which lack some of these files.
Set MAC address
This platform uses an Intel Flash Descriptor, and defines an Intel GbE NVM region. As such, release/build ROMs will contain the same MAC address. To change the MAC address, please read nvmutil documentation.
Update an existing Libreboot installation
NOTE: This section only applies if you haven’t enabled write protection. You can otherwise use the external flashing instructions (see below) for both the initial installation and updates, but for updates you don’t need to re-erase the private flash, if it was already erased.
If you’re already running Libreboot, and you don’t have flash protection turned on, internal flashing is possible, but please note:
You must only flash the first 12MB, and nothing in the final 4MB of the flash. This is because the EC firmware is in flash, and we don’t touch that during initial installation or during updates.
Update it like so:
Create a dummy 16MB ROM like so:
dd if=/dev/zero of=new.bin bs=16M count=1Then insert your 12MB Libreboot ROM image into the dummy file:
dd if=libreboot.rom of=new.bin bs=12M count=1 conv=notruncThe libreboot.rom file is the 12MB image from Libreboot. The new.bin file is the Libreboot ROM, padded to 16MB. You will not flash the entire 16MB file, but flashprog detects a 16MB flash IC. This just makes flashrom not complain about mismatching ROM/chip size.
NOTE: Libreboot standardises on flashprog now, as of 27 January 2024, which is a fork of flashrom.
You should flash each region individually:
flashprog -p internal --ifd -i gbe -w new.bin --noverify-all
flashprog -p internal --ifd -i bios -w new.bin --noverify-all
flashprog -p internal --ifd -i me -w new.bin --noverify-all
flashprog -p internal --ifd -i ifd -w new.bin --noverify-all
NOTE: The --ifd option uses the regions defined in the flashed IFD, so they must match the ROM. You can otherwise dump a layout file and use that, using the instructions below (using -l layout.txt instead of --ifd).
NOTE: If you already did an installation before, and you don’t want to change the MAC address stored in the gbe region, you can skip the gbe/ifd/me regions as above, and flash just the BIOS region.
NOTE: Use of --ifd requires flashrom 1.2 or higher. If you have an older version, or you don’t have --ifd, you could instead do:
ifdtool -f layout.txt libreboot.romThen, instead of --ifd you would use -l layout.txt.
ALSO: The --ifd option makes flashrom flash regions based on what’s in the current flashed IFD.
Flashing Libreboot first time (hardware)
PLEASE ENSURE that you dump a copy of both flash ICs (system flash and private flash). Take two dumps of each, and make sure each has two good hashes. This is because there are certain files that, while you may not need for a regular Libreboot installation, may be useful for recovery purposes. You have been warned!
This section is relevant to you if you’re still running the original HP firmware. You must flash externally.
Take stock of these further notes, because there are extra steps that you must take.
HP Sure Start
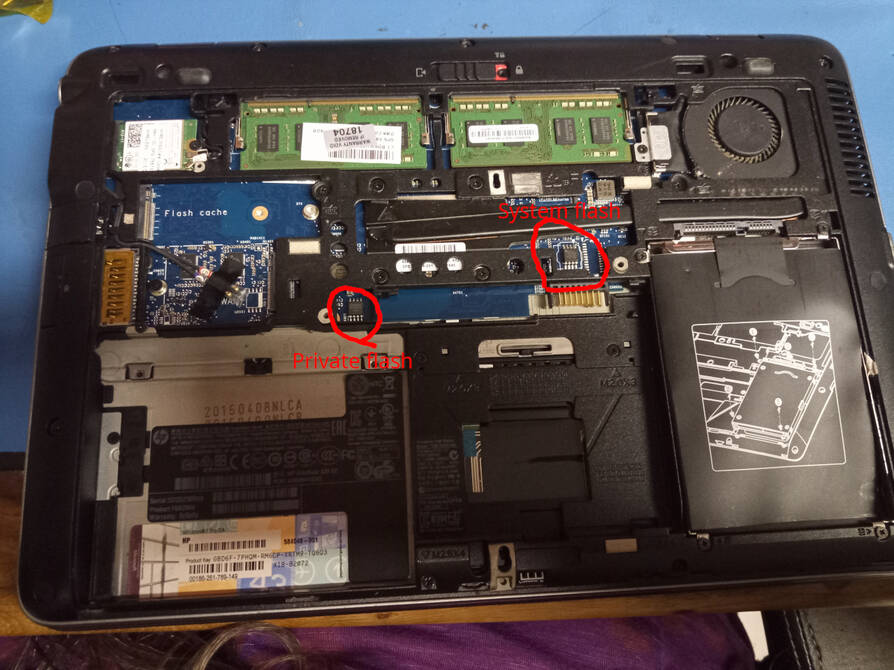
There is a 16MB flash and a 2MB flash. Read this page for info: https://doc.coreboot.org/mainboard/hp/hp_sure_start.html
The page makes it seem more complicated than necessary, from a user’s point of view. What you really need to do is just erase the 2MB flash IC, and flash only the first 12MB of the 16MB flash IC. A photo is shown below. Consult the SPI flashing guide and act as if you were flashing, but leave out -w libreboot.rom (don’t write an image), and instead use the --erase option, with your clip connected to the private flash (2MB flash IC).
You might want to dump the private flash first, just in case (use -r priv.rom or whatever filename you want to dump to, and take two dumps, ensuring that the hashes match). The private (2MB) flash is inaccessible from your OS. The system stores hashes of the IFD, GbE and a copy of IFD/GbE in private flash, restoring them if they were modified, but erasing the private flash disables this security mechanism.
Here is a photo of the board, with the flashes:
HP bootblock
See: https://doc.coreboot.org/mainboard/hp/elitebook_820_g2.html?highlight=elitebook
In this page it talks about HP’s own bootblock and EC firmware. These are in the final 4MB of the flash. You must not modify these, because you will brick your machine unless the IFD is modified;
This is why Libreboot provides 12MB images. The IFD in Libreboot is modified, as per this coreboot documentation, to make the BIOS region end at the last byte of the first 12MB in flash, bypassing HP’s security entirely. In other words, you can run whatever you want (such as Libreboot) in the first 12MB of flash, so long as the upper 4MB is untouched and the private 2MB flash has been erased.
With Libreboot’s modified IFD, HP’s own bootblock is never executed, but the EC firmware is, and must be left alone. You do not to insert it in your Libreboot ROM because it’s already in flash, within that last 4MB.
Flash a ROM image (hardware)
REMOVE all power sources like battery, charger and so on, before doing this. This is to prevent short circuiting and power surges while flashing.
For general information, please refer to 25xx NOR flash instructions.
Remove the bottom cover via the latch, and the flashes are accessible. First, dump both flashes for backup, using the -r option (instead of -w) in flashrom. Two dumps of each flash, make sure both dumps match for each chip.
We will assume that your system flash (16MB) dump is named dump.bin. This is the dump of your 16MB flash, containing HP’s firmware, including the final bootblock and EC firmware.
This gives you everything, including the final 4MB. Now insert your new ROM into a copy of dump.bin:
cp -R dump.bin new.bin
dd if=libreboot.rom of=new.bin bs=12M count=1 conv=notrunc
Flash new.bin to system flash (16MB IC) using the -w option in flashrom, and erase the private (2MB) flash IC, using the --erase option (instead of -w filename.rom) in flashrom.
In the above example, you replaced the first 12MB of the HP dump with that of your Libreboot image, but leaving the final 4MB intact which contains the EC firmware. Libreboot’s custom IFD sets everything so that all regions, from IFD to GbE, ME and then BIOS region, exist within the first 12MB of flash. This makes the machine boot from the end of the 12MB section, containing the coreboot bootblock, instead of the HP bootblock (which is never executed but must remain intact).
It’s very important that you erase the 2MB flash. Be careful not to erase the system (16MB flash). This is yet another reason why you should keep a backup of both flash ICs, just in case (dumped using -r in flashrom).
And that’s all. Refer to other documents on Libreboot’s website for how to handle Linux/BSD systems and generally use your machine.
TPM 2.0 potentially supported
The onboard TPM is an SLB 9660, which supports TPM 1.2 but it is known to be compatible with TPM 2.0 via firmware upgrade. Although not yet tested, we have some notes about that here:
Not yet used meaningfully by Libreboot itself, but the TPM can be used to implement things like measured boot.
References
See: https://doc.coreboot.org/soc/intel/broadwell/blobs.html
Libreboot’s build system automatically pulls down the MRC/refcode files, and modifies the refcode to enable the onboard Intel Gigabit Ethernet (GbE). You don’t need to mess with this at all, when you build Libreboot yourself.
You can see how this works, by looking at the patch which added 820 G2 support: https://browse.libreboot.org/lbmk.git/commit/?id=401c0882aaec059eab62b5ce467d3efbc1472d1f
If you’re using release builds, the MRC, refcode and (neutered) ME images are missing from flash, and must be re-inserted, using the instructions on this page.
Markdown file for this page: https://libreboot.org/docs/hardware/hp820g2.md
Subscribe to RSS for this site
This HTML page was generated by the Untitled Static Site Generator.